In this guide, I will demonstrate how to create a super simple WordPress options page using the modern WordPress approach (with React) and utilising the core Gutenberg components.
This guide is primarily aimed at people who have some WordPress experience but have never tried “the React way”, but it should be useful for anyone trying to get into into modern WordPress development. We’ll go through everything step-by-step, while also dipping our toes into some more advanced things that are incredibly useful for any WordPress developer (the command line and using WP-CLI).
The only requirement for this guide is that you have node and npm installed. If you don’t have node on your computer already, you can download it here, and it will come with npm included.
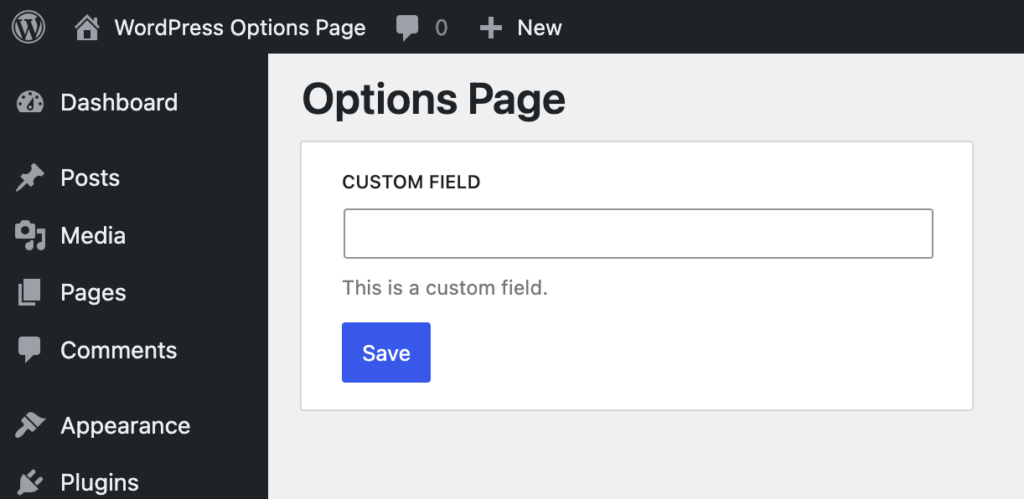
This is what we’ll have at the end of this guide:

Step 1: Setting up the project
The first thing we have to do is set up a new project. We’ll be using the excellent @wordpress/scripts package, which makes it super easy to compile your JavaScript source code.
Let’s start by creating an empty directory from our terminal and starting a new npm project:
Terminalmkdir wordpress-options-page cd wordpress-options-page npm init
The npm init command will ask you a few questions to set up your new project—feel free to change anything here, or just press Enter a couple times to accept all the default options. You’ll see a new package.json file was created in the directory.
I’m using some basic commands in the code above. mkdir (“make directory”) creates a new empty directory, and cd (“change directory”) changes the current directory you’re in. It’s a good idea to get familiar with basic shell commands since they’re ubiquitous and incredibly useful. If you’re anything like me, you might end up using them all the time once you’re comfortable with them.
Now that we’ve set up our new empty package, we can install the @wordpress/scripts package:
Terminalnpm install @wordpress/scripts --save-dev
This command will install the @wordpress/scripts package and add it to your package.json file. We will also need to add the relevant commands for our project, so let’s open up package.json and substitute the scripts part with this:
JSON{ "scripts": { "build": "wp-scripts build", "start": "wp-scripts start" } }
There’s a bunch of other commands in the @wordpress/scripts package, but all we need for this guide is the start and build commands.
There’s one more thing left to do—creating a JavaScript file for our admin page code. Run the following commands:
Terminalmkdir src touch src/admin.js
This creates a new src directory inside our project, and adds the admin.js file to it.
The touch command “touches” a file. This means that if a file already exists, it will update the “Last Modified” date of the file. If the file does not exist, it will simply create it.
@wordpress/scripts does not know about our new file, so we need to tell it about it. To do so, create a new file called webpack.config.js:
Terminaltouch webpack.config.js
Add the following code to this file:
JSconst defaultConfig = require( '@wordpress/scripts/config/webpack.config' ); module.exports = { ...defaultConfig, entry: { ...defaultConfig.entry(), admin: './src/admin.js', }, };
The details aren’t super important for this guide, but this code essentially tells @wordpress/scripts (which uses Webpack internally) to keep everything as-is, but add our admin.js file to the list of files to compile.
Let’s try to build our project:
Terminalnpm run build
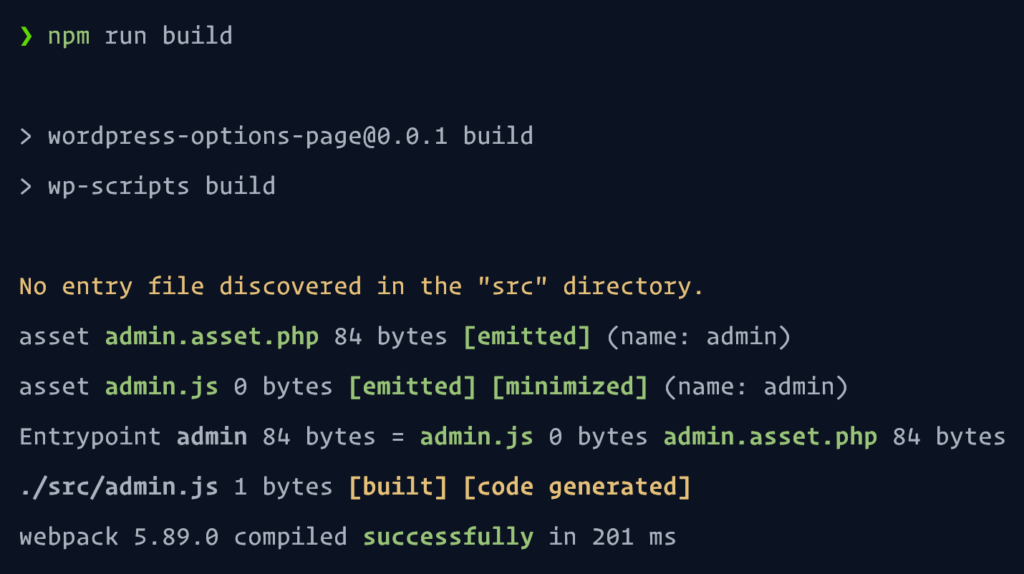
If everything went well, you should see something that looks like this:

You should also have a new build folder in your project, with two new files: admin.js and admin.asset.php.
If you run into any errors here, please leave a comment or tweet/DM me on X and I’ll take a look!
Step 2: Setting up a plugin
If you’re adding code to a theme or an existing plugin, you can skip this step. Just add the code from the next steps to your functions.php file (if using a theme) or to your plugin code.
Now that we’re successfully compiling our JavaScript code, it’s time to start adding it to our site. Let’s create a new empty plugin:
Terminaltouch wordpress-options-page.php
To make sure WordPress recognizes our file as a plugin, we need to add a plugin header. Add the following code to the top of this file:
PHP<?php /** * Plugin Name: WordPress Options Page * Description: An example options page built with React. * Author: Daniel Post * Author URI: https://danielpost.com * License: GPL-3.0 * Version: 1.0.0 */
You can of course change everything here to match your project. This will give us an empty plugin to add our code to.
Step 3: Running the plugin locally
Now that we have our plugin, we need some way to test it and see our changes. Fortunately, the @wordpress/env package makes this super simple. Run the following commands in our project directory:
Terminalnpm -g i @wordpress/env wp-env start
This will install the @wordpress/env package globally, and spin up a new local WordPress installation with our plugin already installed and activated at http://localhost:8888. You can login to /wp-admin with username admin and password password.

Step 4: Create an empty admin page
With our plugin up and running, we are ready to add our admin page. Add this code to your newly created plugin:
PHPfunction wop_add_admin_page() { add_menu_page( __( 'Options Page', 'wop' ), __( 'Options Page', 'wop' ), 'manage_options', 'wop-admin-page', 'wop_render_admin_page' ); } function wop_render_admin_page() { echo '<div id="wop-admin-page"></div>'; } add_action( 'admin_menu', 'wop_add_admin_page' );
This code adds a new admin page to the sidebar in the WordPress admin area for users with the manage_options capability. The actual page itself simply renders an empty div with the wop-admin-page ID—we will hook into this using React in part 2 of the guide.
Step 5: Include our JavaScript files
Next, we want to include the JavaScript file we built in step one on our admin page:
PHPfunction wop_enqueue_scripts() { $page = get_current_screen(); if ( 'toplevel_page_wop-admin-page' !== $page->id ) { return; } $asset_file = include( plugin_dir_path( __FILE__ ) . 'build/admin.asset.php' ); wp_enqueue_script( 'wop-admin-page', plugins_url( 'build/admin.js', __FILE__ ), $asset_file['dependencies'], $asset_file['version'], true ); wp_enqueue_style( 'wp-components' ); } add_action( 'admin_enqueue_scripts', 'wop_enqueue_scripts' );
This code could use a little explaining:
- We check what page we are on using the
get_current_screenfunction. If we’re not on our admin page, return early and don’t do anything else. - Next, we load the
admin.asset.phpfile. This is a special file generated by the@wordpress/scriptspackage that contains a list of dependencies and a version number that changes each time we build the files. This allows us to automatically add all the required dependencies to our script without having to do any manual work. - We include the script on our admin page, using the dependencies and version number from our asset file.
- Finally, we enqueue the
wp-componentsstylesheet, which adds the required styles for the WordPress components that we will use in the next part.
And with that, we have built a custom plugin that adds an empty admin page with our own JavaScript code. We will learn how to actually add some options to this page in part 2 of the guide.


Leave a Reply